What is Concrete Curbing?
Concrete Curbing is most commonly seen around parking lot landscaping islands, sidewalks, roadways, or paver bricks.
Their are several different types of curbing:
- 1 Extruded curb – 6″ high border curbing which is poured directly onto the surface
- 2 Modified D – 6″ high border curbing which is trenched 6″ below the surface, for a total height of 12″
- 3 True D – 6″ high border curbing which is trenched 12″ below the surface, for a total height of 18″
- 4 B Curbing – 6″ high border curbing with a shallow gutter attached
- 5 F curbing – 6″ high border curbing with a wider gutter than B curbing. Often found along roadways that have raised landscaping or sidewalks on the side and require a combination of curbing and Valley Gutter
- 6 Valley Gutter Curbing – 12″ wide curb that is flush with the existing materials on either side and slopes down to the middle. This curbing is commonly seen at the center of inverted roads and on the sides of crown roads and flows water to a catch basin
- 7 Header Curbing – 6″ or 12″ wide curb that is flush with the existing materials on either side and is flat on the surface. This curbing is usually used as a border for asphalt, paver brick, or concrete surfaces to provide a solid edge and separate them from landscaping
Why is Concrete Curbing Important?
Concrete Curbing is important because it provides a structural border between landscaping and pedestrian or roadway surfaces. Concrete Curbing can also assist in drainage.
How is Concrete Curbing Installed or Repaired?
If Concrete Curbing is going to be newly installed, the first step is preparing the area for the new curbing.
Many times this includes trenching or excavating the area, and ensuring there is a suitable base on which to pour the new curbing.
Sometimes, a ‘curb pad’ is poured as a base to provide an appropriate support, or DOT approved limerock may be supplied, installed, and compacted to an adequate base.
Once the area is properly prepped for new concrete, curb mix concrete is loaded into a curb machine which then runs along the side of the new curbing and extrudes the concrete to the proper shape. For added tensile strength, a steel cable, fiber mesh, or rebar may be inserted during the extrusion process.
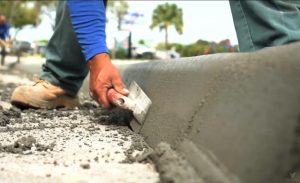
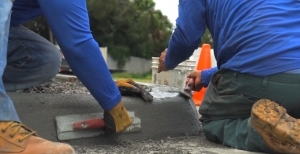
 Once the concrete is installed, any edges are finished by hand.
If existing Concrete Curbing is going to be repaired, the first step is removing the existing damaged curbing.
A professional grade wet-saw with a diamond blade is used to cut the edges of the damaged section of curbing and then it is removed and properly disposed of.
Next, the area is assessed for what is causing the concrete curbing to become damaged in the first place.
Often times it may be the roots of nearby trees that have lifted up or cracked the curbing. Other times, the damage was caused by impact from a vehicle. If the damage is root-related, the tree roots may be saw-cut and removed or ground down using a stump grinder.
Once the area is free of obstructions, the new concrete curbing is installed in the same manner described above.
